

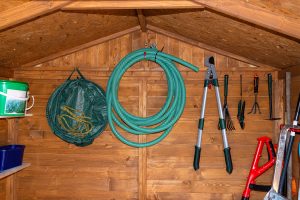
 A garden shed is only as useful as the space inside it. If you have to move three bags of compost to find a hand trowel, or you cannot open the door without something falling on your foot, your shed is working against you. The good news is that a bit of planning and a few basic storage solutions can turn even the most chaotic shed into a space that actually works.
This guide walks you through how to organise a garden shed from scratch, covering decluttering, shelving, tool storage, and how to make the most of every inch of space. It is aimed at homeowners in Essex who already have a shed and want to get more out of it.
Step 1: Start with a Full Declutter
Before you add any new storage, take everything out of your shed. Lay it all on the lawn or path so you can see what you actually have.
As you go through it, split things into three groups:
- Keep — things you use regularly or will need again
- Donate or sell — items in good condition that you no longer need
- Bin — broken tools, half-empty dried-up products, and anything past its best
Be honest. Most people find they have two or three of the same thing, or tools they have not touched in years. Getting rid of the clutter before you organise means you are not just rearranging the problem.
Step 2: Think About Storage Zones
The key to a tidy shed is putting things where they make sense. Divide your shed into zones based on how often you use things and how big they are.
| Zone | What Goes Here | Where in the Shed |
|---|---|---|
| Everyday tools | Trowels, secateurs, gloves | Near the door, at eye level |
| Long-handled tools | Spades, forks, rakes, hoes | Wall hooks or floor rack |
| Seasonal items | Christmas lights, paddling pools | High shelves or overhead |
| Chemicals and sprays | Weedkillers, fertilisers | Locked cupboard or high shelf |
| Bulky items | Compost bags, pots, watering cans | Floor level, back of shed |
| Lawn care | Mower, strimmer, fuel | One dedicated corner |
This kind of zoning means you always know where to look, and you can get in and out of the shed quickly.
Step 3: Add Shelving
Shelving is the single biggest improvement you can make to a shed. It takes items off the floor and makes much better use of the vertical space in your shed walls.
When fitting shelves, keep these points in mind:
Fix to the frame, not the cladding. Shed walls are not solid. The structural strength is in the timber frame, not the boards between. Drill into the uprights for a secure fixing. If you are unsure about your shed’s construction, the standard apex shed specification on the Poultons website shows you exactly how a standard shed is framed and where the uprights sit.
Use heavy-duty shelving brackets. A shelf loaded with plant pots and compost bags needs a proper bracket, not a lightweight plastic one.
Leave room for tall items. Do not shelf every wall. Keep at least one run of floor-to-eaves clear for spades, forks, and long-handled tools.
Think about height. Keep heavier items on lower shelves and lighter or seasonal items on higher ones. This makes the shed safer and easier to use.
Step 4: Store Long-Handled Tools Properly
Spades, forks, rakes, and hoes are awkward to store because of their length. Leaving them leaning against a wall is a trip hazard and they always end up falling over.
A simple wall-mounted tool rack or a row of sturdy hooks at chest height is the best solution. You can buy purpose-made garden tool racks, or use heavy-duty hooks screwed into the shed frame. Spacing them about 15–20cm apart gives each tool its own slot.
Some people use a length of timber with holes drilled through it, mounted horizontally, to hold tool handles vertically. This keeps them off the floor and neatly lined up.
Step 5: Make Use of Wall and Door Space
The inside walls and even the back of the shed door are often wasted space. Here is how to use them:
Pegboard panels — a sheet of pegboard fixed to the wall lets you hang tools, trowels, small pots, and accessories using a range of hooks and fittings. You can rearrange it easily as your needs change.
Magnetic tool strips — very useful for smaller metal tools like hand trowels, scissors, and screwdrivers.
Jar storage — screw the lids of glass jars to the underside of a shelf, then screw the jars on. This is a great way to store seeds, screws, nails, and plant labels without taking up shelf space.
Door hooks — a row of hooks on the back of the shed door can hold gloves, twine, trugs, and small hand tools.
Step 6: Plan for Essex’s Weather
Essex winters tend to be damp rather than severely cold, but the clay-heavy soil and wet weather from October through to March means moisture is a real issue for sheds. A poorly maintained shed can create damp conditions that rust your tools and rot wooden handles.
A few things help a great deal:
Ventilate the shed. Leave a small gap at the ridge or use a louvred vent to allow air to circulate. This prevents moisture building up inside.
Clean tools before storing them. Soil left on spades and forks holds moisture and speeds up rust. The RHS has a useful guide to cleaning and caring for garden tools that covers everything from brushing off soil to oiling blades properly.
Oil metal parts. A light coat of general-purpose oil on metal tool heads keeps rust at bay through winter.
Check your cladding. Damp from outside can get in through gaps in old or poorly maintained cladding. If your shed is starting to show signs of weather damage, it is worth looking at the shed cladding options available, from standard shiplap to low-maintenance composite panels.
Step 7: Rotate Items Seasonally
One of the easiest ways to keep a shed organised long-term is to rotate your storage by season. At the start of each season, take five minutes to reorganise so that the things you need most are at the front.
Spring and summer: Mower, strimmer, watering cans, seed trays, and planters at the front. Summer furniture covers and winter items pushed to the back.
Autumn and winter: Move bulb storage, tree ties, and frost protection fleece to the front. Pack away summer tools and push them to the back or up on a high shelf.
Seasonal rotation stops the shed slowly drifting back to chaos. It is also a good opportunity to check tools for damage, oil anything metal, and throw away anything that has not survived the season.
Step 8: Keep Chemicals Safe
Garden chemicals — weedkillers, pesticides, slug pellets, and fertilisers — need to be stored carefully. They should be:
- In their original, labelled containers
- Out of reach of children and pets (a locked cupboard or a high shelf with a catch is ideal)
- Away from frost, which can break down some products
- Away from tools, so there is no risk of contamination
Do not store fuel (for petrol mowers or strimmers) inside the shed. Keep it in a purpose-made fuel can in a ventilated outbuilding or garage, well away from any heat source.
Thinking About a New Shed?
If you are trying to organise a shed that is simply too small for what you need, no amount of clever storage will fully solve the problem. If that sounds familiar, it might be time to think about upgrading.
Poultons has been making garden buildings in Essex since 1951. You can browse the full range of Essex garden sheds on the Poultons website, from standard apex sheds to heavy-duty pent designs, all made to measure and delivered and installed in Essex.